I have done a few local weddings for friends as of late and due to the rave reviews, have decided to open up to clients on a limited basis. I added a contact form for now if you are interested in getting in touch. I have done anything from small parties to baby showers to weddings! My passion is gourmet, tailored cupcakes.
On a funny note, I have posted before that I blog while my children are sleeping. Well, we are expecting baby girl #3 early October and lets just say I have been napping with the girls since wintertime ;) Sadly, not much blogging going on here.
Never fear, there are many pictures just waiting to turn into posts. My next day off I plan on catching up!!!
Happy summer to you all!

Monday, June 30, 2014
Friday, January 10, 2014

Tuesday, December 10, 2013
C'ville Sweets Holiday Gift Guide 2013
There are many products out there that have made my life so much easier as a baking enthusiast! I thought it would be fun to share some items that I really can't live without, and would make great gifts! I have linked to Amazon directly. Full disclosure: If you purchase these through that link then I get a measly percentage in gift cards to try out more fun stuff to share. thanks :)
1. This spatula edge cleans the bowl as it mixes, no breaks to scrape the sides. Keeps you from over-mixing the flour. Once done, use it to scrape the bowl!
2. No more burnt crusts and no more cursing trying to adjust foil, that's silly.
3. This scoop helps you measure the perfect amount of cupcake batter and load your cups in ligthning speed!
4. Best way to make my mini chocolate cookies, mmm
5. The best tips for fancy cupcake icing.
6. The best bags for cupcake icing: holds your whole batch and you throw it away in the end. WOO
7. I love this thing for glossing my cakes or pie crusts. Throw it in the dishwasher.
8. Nothing makes you feel happier than rainbow non pareils!
9. I have 2 of these and LOVE THEM. You can place the cupcakes right in the tray to ice, then use the handles to lower into the container. Air tight too for freshness.
10. Nothing better than a thermometer you can clip to the edge of your bowl for the more delicate recipes.
11. This is on my wishlist. You could put it in the oven, microwave, straight to your mixer. And use it to measure. Brillant.
12. You have to own one of these if you want to ice a cake properly!
13. Again on my wishlist. Would sure make large custom orders much quicker.
14. Wishlist, her website is the best!
15. My wishlist.
16. My wishlist.
Monday, December 9, 2013
Lithuanian Anise Cookies
I wrote this about 3 years ago on my personal blog and wanted to share it here as it is one of the Christmas cookies I try to make every year. My mother's side is Lithuanian and I grew up LOVING these cookies. Hope you enjoy them as much as my family has throughout the years!

Anise Cookies
The first thing you need is a bottle of Anise Oil. Not easy to find. We had to special order it from a family run pharmacy in Downtown Charlottesville. It came in the very next day, most impressive!
 Then next thing you need is some inspiration and motivation. Enter the first snow of the year:
 This was the view from my kitchen:
 And finally you need a small army of strong women. I gathered everyone in the family I could:

Ingredients:
6 eggs3 cups sugar
2 cups mazola (corn) oil
14 cups flour sifted (yes you read that right)
1 tsp. salt
2.5 tsp baking soda
2.5 tsp baking powder
2 cups sour milk or buttermilk (*I will keep you updated if I can find a dairy-free option!)
3/4 tsp anise oil
And the directions verbatim from "Aunt Nell:"
1. Beat eggs well. Add sugar and mix well. Add oil and beat well. Add milk and anise oil.
2. Sift 4 cups flour and to this add baking soda, baking powder, and salt.
3. Add dry ingredients (#2) to step #1 liquid mixture. (Just the 4 cups flour to start)
 4.
Add more flour to make a soft dough (about 10 more cups). 1 cup of this
should be used on board to knead at the end. Use beater until it
becomes too thick: (I got 7 cups of flour in. You know it is too thick
because your red Kitchen aid mixer will start to smell like burning and
will be hot to the touch! eek!)
4.
Add more flour to make a soft dough (about 10 more cups). 1 cup of this
should be used on board to knead at the end. Use beater until it
becomes too thick: (I got 7 cups of flour in. You know it is too thick
because your red Kitchen aid mixer will start to smell like burning and
will be hot to the touch! eek!)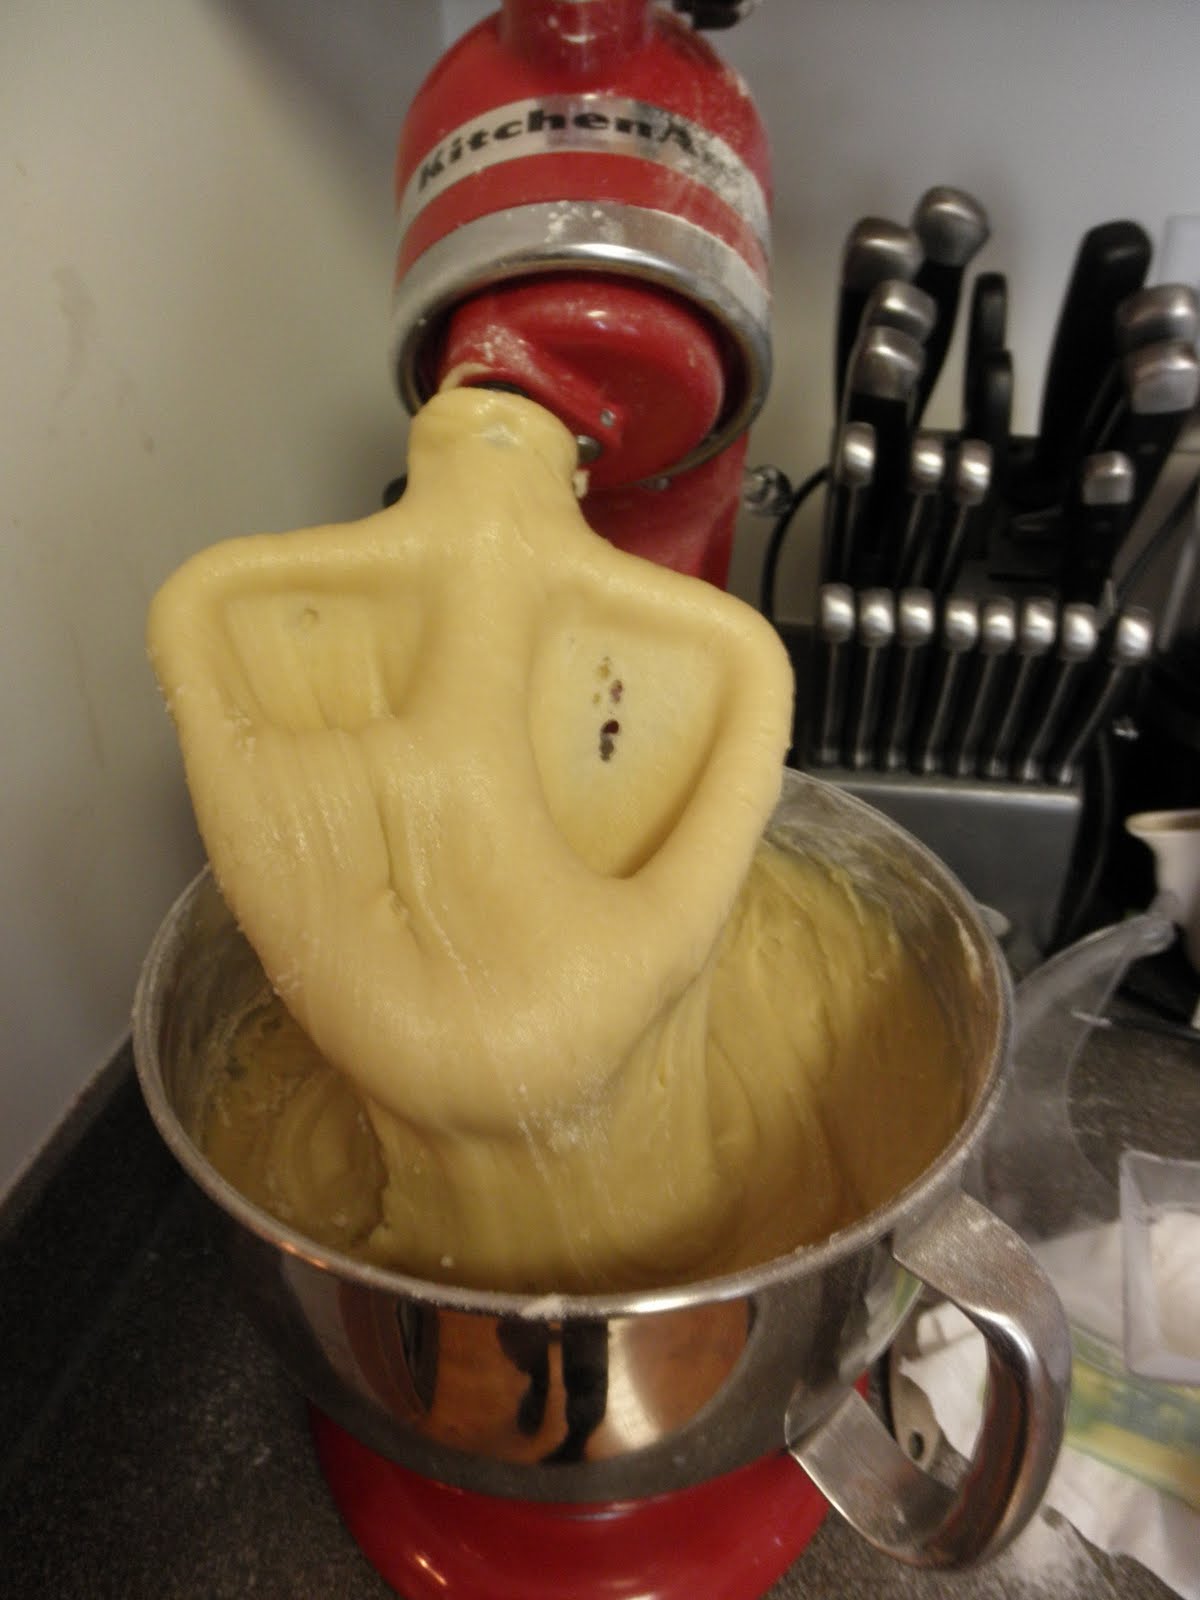 ...then use heavy spoon. (This lasted for one more cup of flour =8 then I gave up)...
 ...then
knead it as a dough. Becomes heavier as your progress. Knead it well.
(This is where the army of strong women starts to pay off. Thank God I
have had a baby to carry around as an upper arm workout.)
...then
knead it as a dough. Becomes heavier as your progress. Knead it well.
(This is where the army of strong women starts to pay off. Thank God I
have had a baby to carry around as an upper arm workout.) 5.
Take about the size of a walnut and roll in had into string and put
together in a circle. Make hole rather big as it closes up when baked.
(This was very time intensive, really wishing I had army of women at
this point)
5.
Take about the size of a walnut and roll in had into string and put
together in a circle. Make hole rather big as it closes up when baked.
(This was very time intensive, really wishing I had army of women at
this point) 6.
Bake at 350 degrees for 10 minutes on greased cookie sheet. Turn pan in
oven after 8 min. (I don't know why but I'm sure they wrote that for a
reason so I did it)
6.
Bake at 350 degrees for 10 minutes on greased cookie sheet. Turn pan in
oven after 8 min. (I don't know why but I'm sure they wrote that for a
reason so I did it)
Then you get this, but you aren't done yet!

Leave icing in bowl
and dip cookies one at a time. Dip upside down and blow hole so it opens
then take spoon and remove whatever runs down on sides.
Icing for Anise Cookies:
Ingredients:
1/2 box powdered sugar (AKA 2 cups)
1 tablespoon butter melted
boiling water
a couple drops of anise oil (to taste)
1/2 box powdered sugar (AKA 2 cups)
1 tablespoon butter melted
boiling water
a couple drops of anise oil (to taste)
You
will use about 1 box powdered sugar for whole recipe. It is best to
start with this 1/2 recipe or it becomes hard until you ice all the
cookies (true that).
Now
here is the thing. They don't specify how much boiling water. Or what
to do with ingredients. Basically you get a small bowl and melt the
butter then add the powdered sugar. Then you add the boiling water and
mix until it is not too thick or too thin. I topped it off with 2 drops
of anise oil at the end. You just have to get a feel for it. You want
some transparency but not too much...so here are what mine looked like:

 I got a little fancy and added some extra flair by flinging extra frosting all over:
Is it worth the work? YES. Husband and friend approved. Makes enough to mail to family for Christmas, and take to 2 Christmas parties, and eat some everyday for a week. :) Now all you need is a shot of Veritas and you are a true Lithuanian!
Wednesday, November 27, 2013
Dairy Free Pumpkin Pie and Whipped Cream Topping
Happy Thanksgiving!!!
This is the first holiday I have been dairy free, and I was determined to enjoy some pumpkin pie. Something like, "you can have your pie and eat it too?" heh Anyway...
Ingredients:
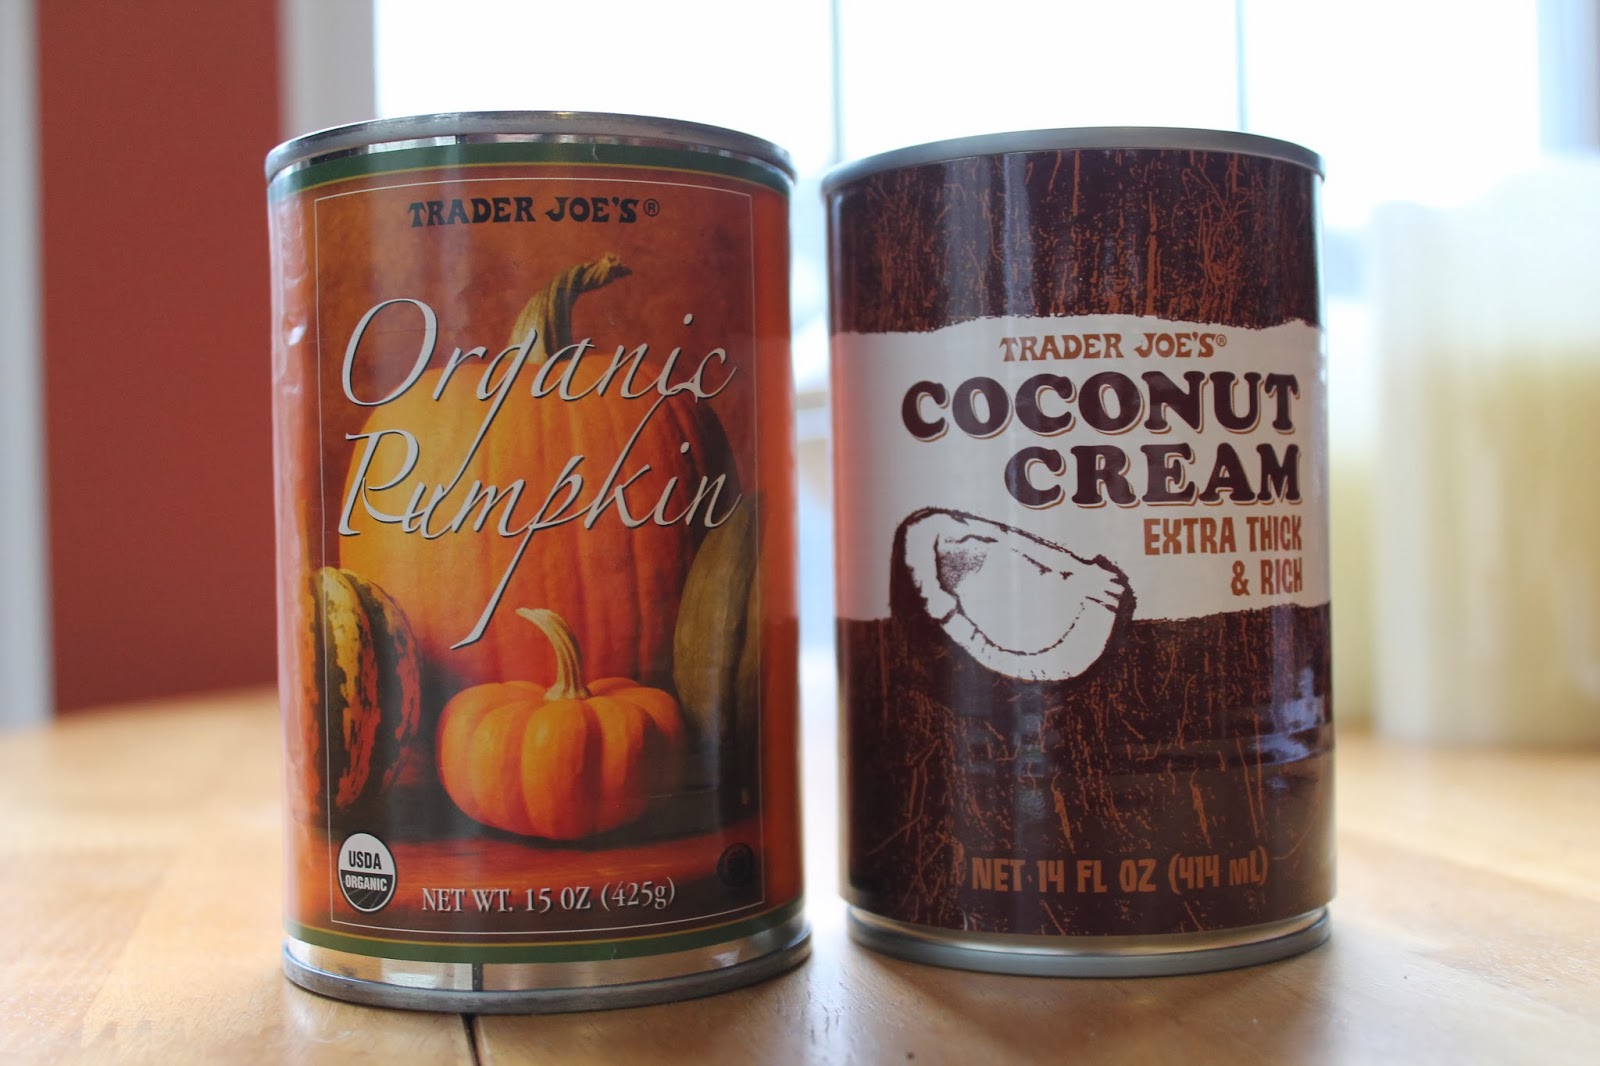 |
| Love Trader Joes! |
- Your favorite dairy free crust (Pillsbury roll out crusts and Harris Teeter Brand crusts are my fav and yes, dairy free!)
- 1 can of pumpkin
- 1 can coconut cream
- 1/2 cup dairy-free milk (I used almond)
- 2 large eggs
- 3/4 cup packed brown sugar
- 1 tsp pumpkin pie spice
- 1/4 tsp salt
- 3 Tbs powdered sugar
 |
| Separated cream set aside |
- Lay your crust out to come to room temperature
- Preheat oven to 375 degrees
- Do not shake your can of coconut cream!!!
- Remove thick cream from top of can of coconut cream and set aside in small bowl.
- Use remainder of coconut milk/water mixture and add in thick separated cream by spoonful until it measures to 1 cup. Keep the rest of cream separated and put in fridge to chill.
- Place this cup of coconut cream/milk and add to mixing bowl. Add in can of pumpkin, 1/2 cup milk, eggs, sugar, spice and salt. Mix on high until combined evenly.
- While mixing, prepare your crust in a pie pan.
- Pour mixture into unbaked crust and place in oven.
- Cover edges of crust to prevent burning.
- Bake for 45 to 50 minutes.


 Whipped Cream:
 - While pie is baking and once cream has chilled, place cream in mixing bowl with whisk attachment.
- Whisk coconut cream on highest setting for 2 minutes.
- Add in powdered sugar and mix again on highest setting until fluffy.
- Serve on pie!!!
- ENJOY :)


I am reveling in this season of Thanksgiving and the gratitude I have for my family, friends, faith, and blessings. Enjoy the season!
 |
| My biggest blessings. |
Wednesday, November 20, 2013
Chocolate Chip Cookie Cake
Chocolate Chip Cookie Cake is a guilty pleasure of mine. One of my favorite memories of a cookie cake was back in college during graduation week. My friend and I devoured a cookie cake slathered in Orange and Blue icing. Go HOOS! We were both mortified the next few days when our poo was colored bright green. Finally one of us broke the silence and mentioned it. We were so relieved we weren't dying of some strange green-poo illness.
Now that I compltely grossed you out (I am a nurse after all), lets talk dairy-free cookie cake.
To get the best results, here is my go-to recipe:
2 1/4 Cup flour
1tsp salt
1tsp baking soda
1 Cup packed brown sugar
1/2 Cup sugar
1 Cup Earth's Best Butter Alternative
1tsp vanilla
2 eggs
1 package of Chocolate Chips: dairy free. (I recommend Enjoy Life or Trader Joe's Semi Sweet brands)
Directions:
1. Preheat oven to 375.
2. Set out butter and eggs.
3. Combine flour, salt, and baking soda in a separate, small bowl.
4. Combine sugars, butter, and vanilla in a mixing bowl. Mix on high for a few minutes.
5. Add eggs and mix to combine.
6. Add in flour mixture and mix only enough to combine.
7. Spread on large, greased pizza tray. Using spatula, make a big blob in center and work your way out to almost the very edge.
8. Bake at 375 for 17 mins.
Once cooled, you can ice it!
8oz Dairy-Free Cream Cheese Alternative (Tofutti Brand, is the BEST)
1/4 lb Dairy-Free Butter Alternative (Earth Balance Brand is the BEST)
2 tsp bourbon vanilla paste
1 lb = 4 cups powdered sugar (give or take)
Directions:
Make sure cream cheese and butter are the same temperature. Beat on high speed in mixer until combined. Add vanilla and sugar until desired consistency is reached. Increase speed of mixer to high until combined.Pipe onto cooled cookie using tip of your choice.
**If you have kids or are kid-like at heart, add sprinkles to the icing!**
Now that I compltely grossed you out (I am a nurse after all), lets talk dairy-free cookie cake.
To get the best results, here is my go-to recipe:

Dairy-Free Chocolate Chip Cookie Cake
Ingredients:2 1/4 Cup flour
1tsp salt
1tsp baking soda
1 Cup packed brown sugar
1/2 Cup sugar
1 Cup Earth's Best Butter Alternative
1tsp vanilla
2 eggs
1 package of Chocolate Chips: dairy free. (I recommend Enjoy Life or Trader Joe's Semi Sweet brands)
.jpg) |
| I was hungry for a cookie :) |
1. Preheat oven to 375.
2. Set out butter and eggs.
3. Combine flour, salt, and baking soda in a separate, small bowl.
4. Combine sugars, butter, and vanilla in a mixing bowl. Mix on high for a few minutes.
5. Add eggs and mix to combine.
6. Add in flour mixture and mix only enough to combine.
7. Spread on large, greased pizza tray. Using spatula, make a big blob in center and work your way out to almost the very edge.
8. Bake at 375 for 17 mins.
Once cooled, you can ice it!
Dairy-Free Cream Cheese Icing Recipe
Ingredients: 8oz Dairy-Free Cream Cheese Alternative (Tofutti Brand, is the BEST)
1/4 lb Dairy-Free Butter Alternative (Earth Balance Brand is the BEST)
2 tsp bourbon vanilla paste
1 lb = 4 cups powdered sugar (give or take)
Directions:
Make sure cream cheese and butter are the same temperature. Beat on high speed in mixer until combined. Add vanilla and sugar until desired consistency is reached. Increase speed of mixer to high until combined.Pipe onto cooled cookie using tip of your choice.
**If you have kids or are kid-like at heart, add sprinkles to the icing!**
Monday, November 18, 2013
Genuine German Chocolate Black Forest Cake
AKA Schwarzwälder Kirsch Torte
(My husband would be able to say this correctly)
Let me tell you a little story. It is about my husband and his birthday. It happens to fall on January 9th. Every year, I survive working motherhood and create memorable hoidays for us. I get through Halloween, Thanksgiving, Christmas planning, Christmas, and then New Years. Then, every year, right after New Years, my husband has a birthday. Two things always happen: I am out of breath and money. So every year he gets a lame birthday. Add onto that this year my horrible PPD (I'm a survivor!) and I basically asked him to reschedule his birthday. We literally re-scheduled his birthday.
So come July, I was ready for action. I surprised him with an ipad and planned an evening at Veritas Winery with some friends to enjoy the stars, wine, live band, and dancing.
I asked him what kind of birthday cake he wanted and he said: "Schwarzwälder Kirsch Torte."
So I took this request pretty seriously because he has been to Germany and tasted genuine German cake. I hunted down some Kirsch from the sole ABC store in town that carried it, and paid $55 for the bottle too. Then I headed over to Whole Foods to find the right cherries and chocolate. Then I grabbed all the other essentials at the Teeter. I almost made it completely dairy-free but my whipped frosting didn't quite come out as i had hoped. Alas. To the whipping cream I returned.
Here is the thing about this recipe: It was foreign to me and took a few attempts. The cake is mainly egg-based, which really threw me for a loop. The cakes didn't rise quite like I was expecting either.
 A late night and lots of cursing later, I had 3 cakes prepared and set for the morning.


Did I follow my instructor's complete directions to build a perfect birthday cake? No, I didn't have time for that. So the cake was a bit uneven but it was quite delicious. The husband was pleased. My culinary friend's dad was pleased. I was pleased. Mission accomplished.
If you feel so inclined to attempt the most expensive and time consuming cake I've done yet, recipe here.
(My husband would be able to say this correctly)
Let me tell you a little story. It is about my husband and his birthday. It happens to fall on January 9th. Every year, I survive working motherhood and create memorable hoidays for us. I get through Halloween, Thanksgiving, Christmas planning, Christmas, and then New Years. Then, every year, right after New Years, my husband has a birthday. Two things always happen: I am out of breath and money. So every year he gets a lame birthday. Add onto that this year my horrible PPD (I'm a survivor!) and I basically asked him to reschedule his birthday. We literally re-scheduled his birthday.
So come July, I was ready for action. I surprised him with an ipad and planned an evening at Veritas Winery with some friends to enjoy the stars, wine, live band, and dancing.
I asked him what kind of birthday cake he wanted and he said: "Schwarzwälder Kirsch Torte."
So I took this request pretty seriously because he has been to Germany and tasted genuine German cake. I hunted down some Kirsch from the sole ABC store in town that carried it, and paid $55 for the bottle too. Then I headed over to Whole Foods to find the right cherries and chocolate. Then I grabbed all the other essentials at the Teeter. I almost made it completely dairy-free but my whipped frosting didn't quite come out as i had hoped. Alas. To the whipping cream I returned.
 | ||
| German Chocolate Black Forest Cake |
Here is the thing about this recipe: It was foreign to me and took a few attempts. The cake is mainly egg-based, which really threw me for a loop. The cakes didn't rise quite like I was expecting either.


Did I follow my instructor's complete directions to build a perfect birthday cake? No, I didn't have time for that. So the cake was a bit uneven but it was quite delicious. The husband was pleased. My culinary friend's dad was pleased. I was pleased. Mission accomplished.
 |
| Ingredients |
If you feel so inclined to attempt the most expensive and time consuming cake I've done yet, recipe here.
Subscribe to:
Posts (Atom)